Product tour
See how ConciergeDeck runs the operational front desk.
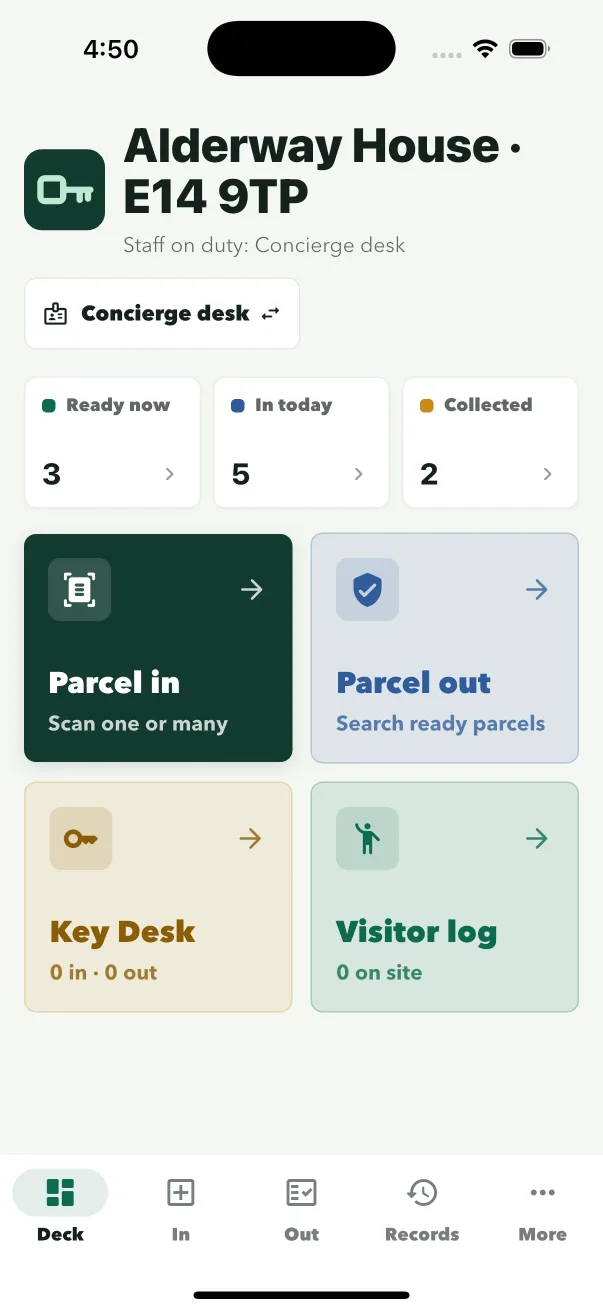
Follow Parcel Desk from arrival to signed collection, see how Key Desk keeps key and fob custody clear and staff-attributed, and run the visitor book from the same app.
- 7
- core reception tasks
- Site to staff
- separate access roles
- App screens
- shown throughout
Reception workflows
Choose the task you want to see.
Parcel Desk and Key Desk stay focused on their own records while sharing the same site access and staff profiles.
Site access
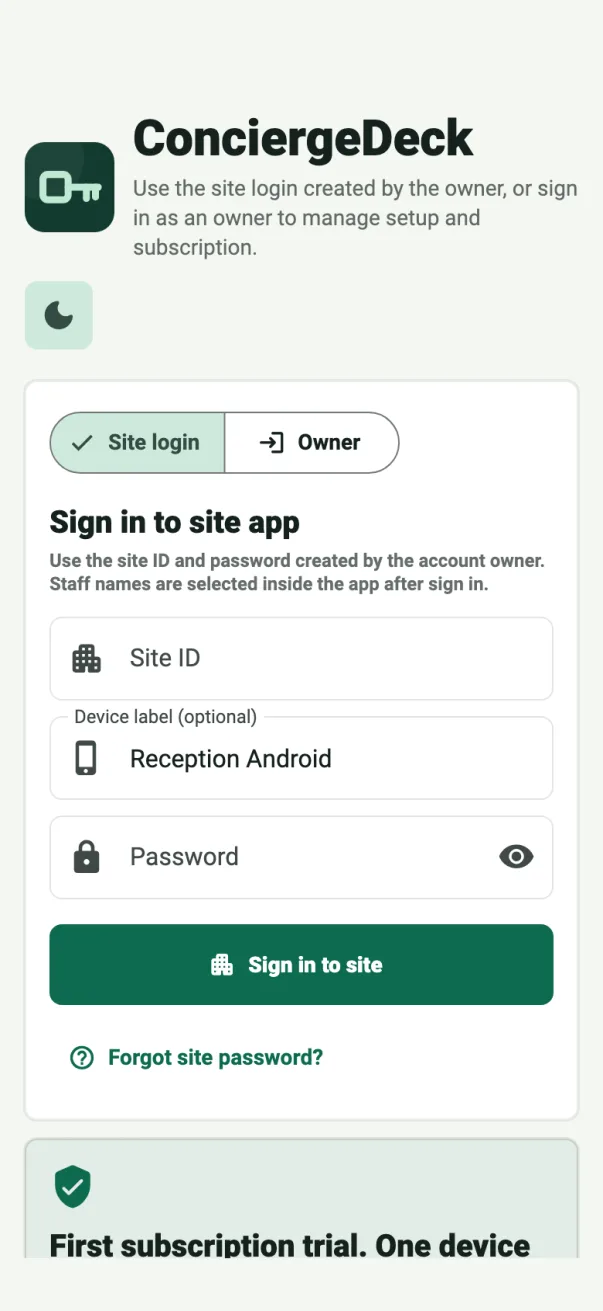
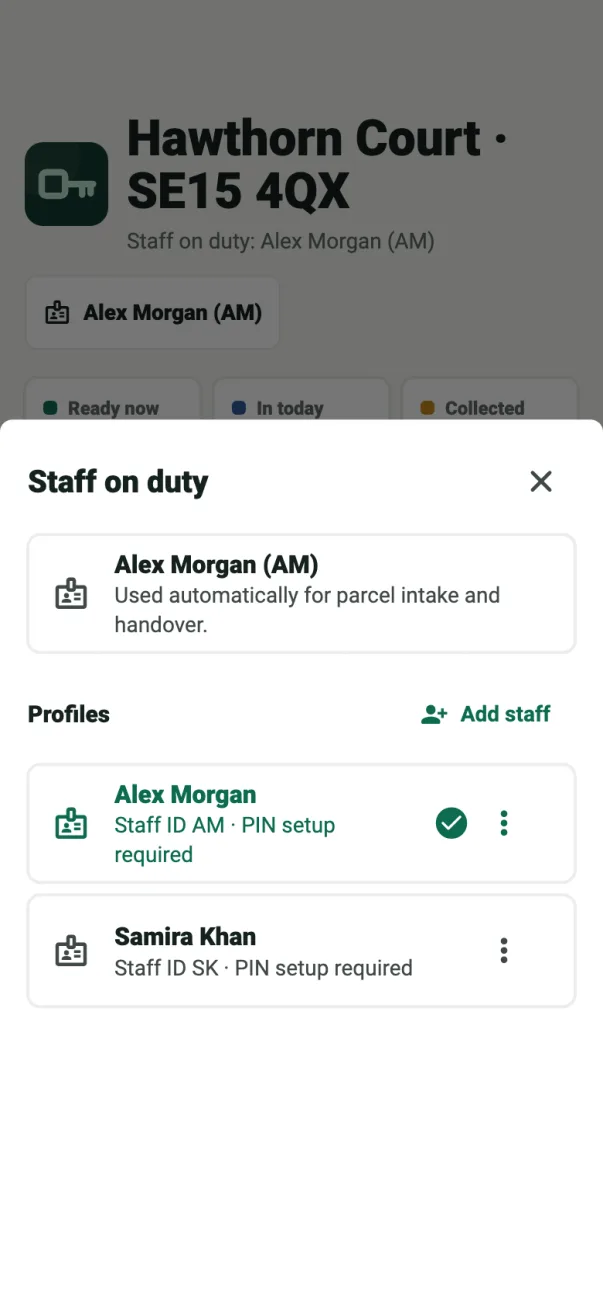
Sign in to the building, then choose the person on duty.
The site ID connects the device to one building. Each staff member chooses their own profile so actions remain attributable.
- Enter the site loginUse the owner-issued site ID and password.
- Choose your profileThe building stays signed in between shifts.
- Switch at handoverSelect the next person without signing the device out.
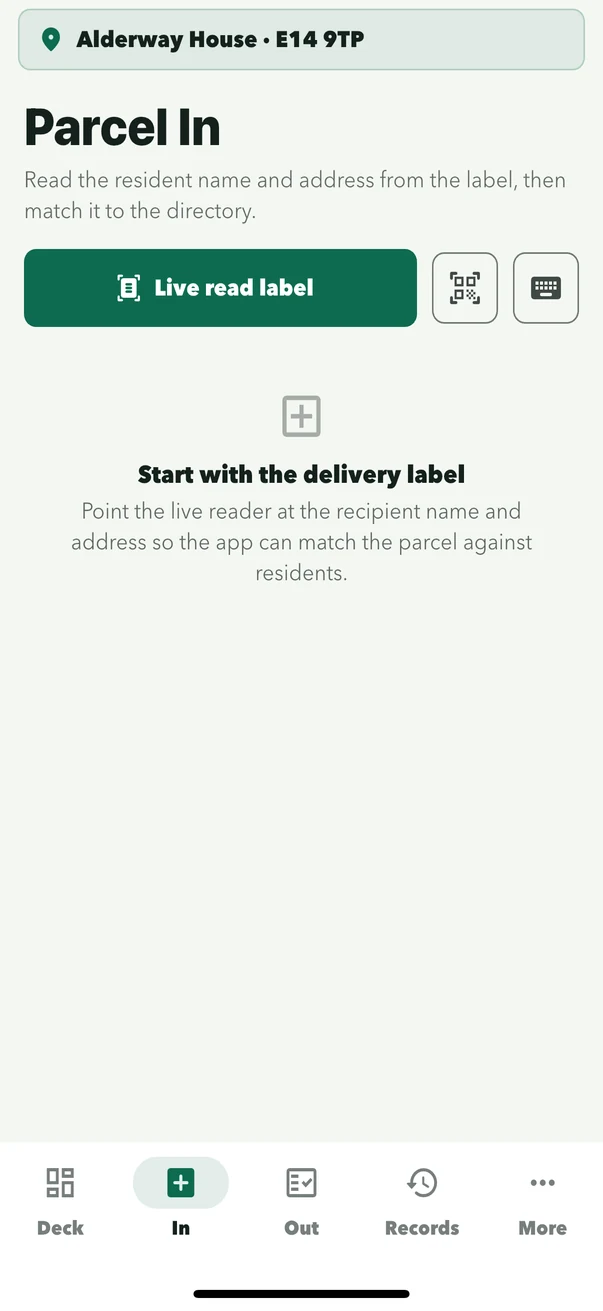
Parcel In
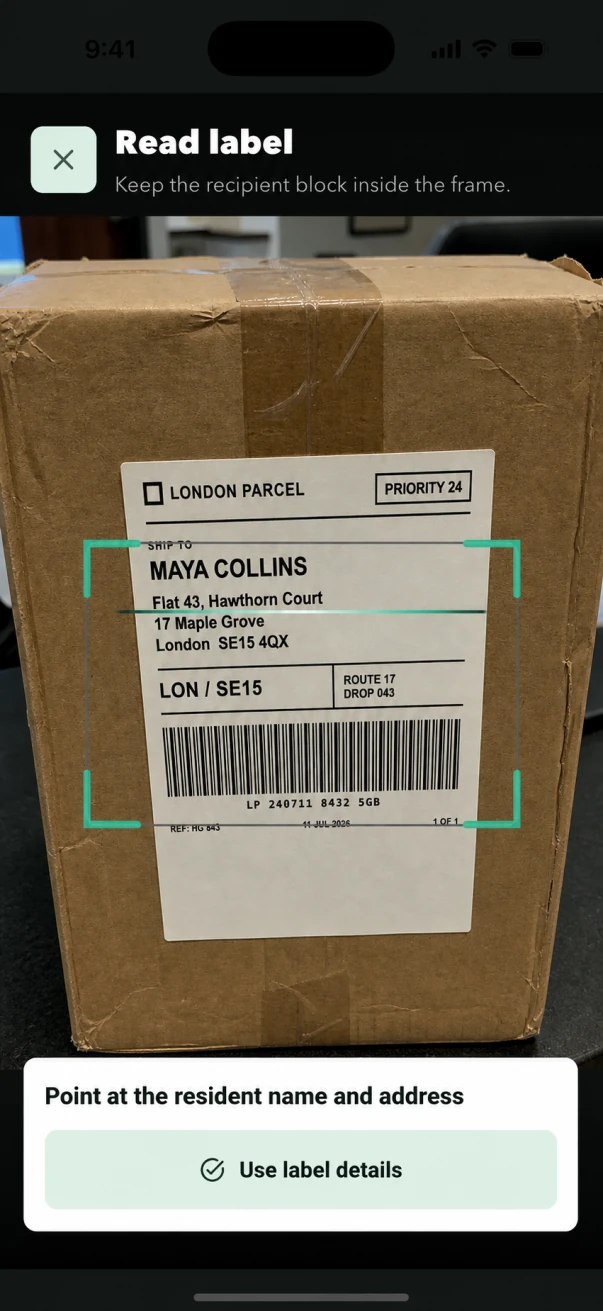
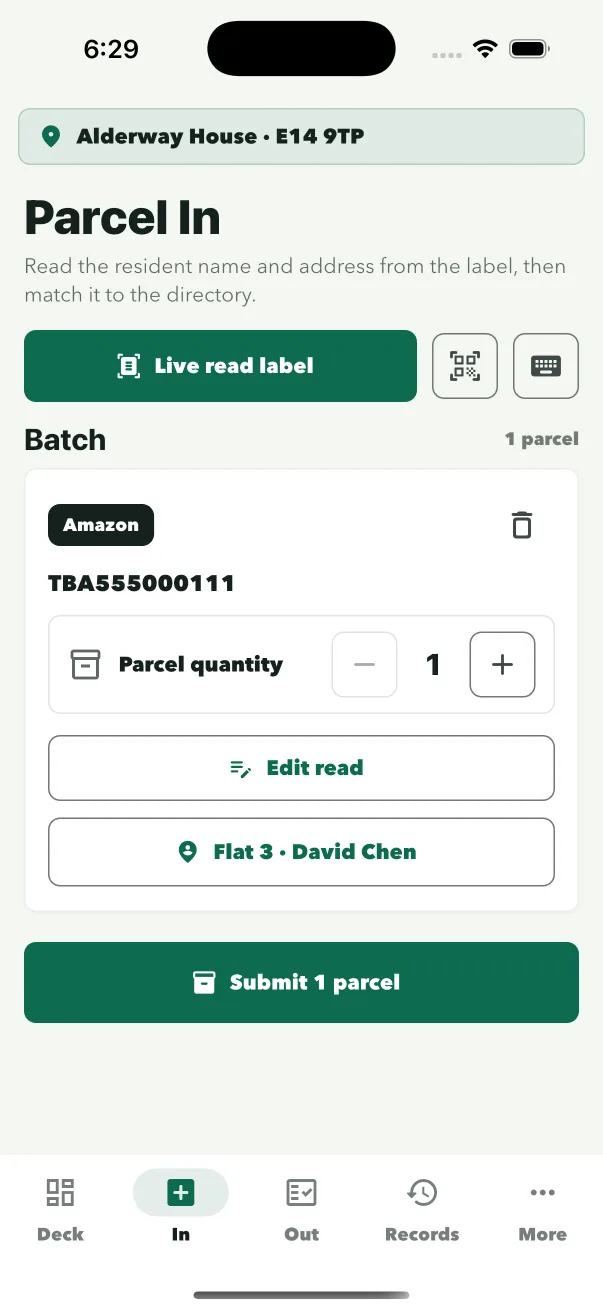
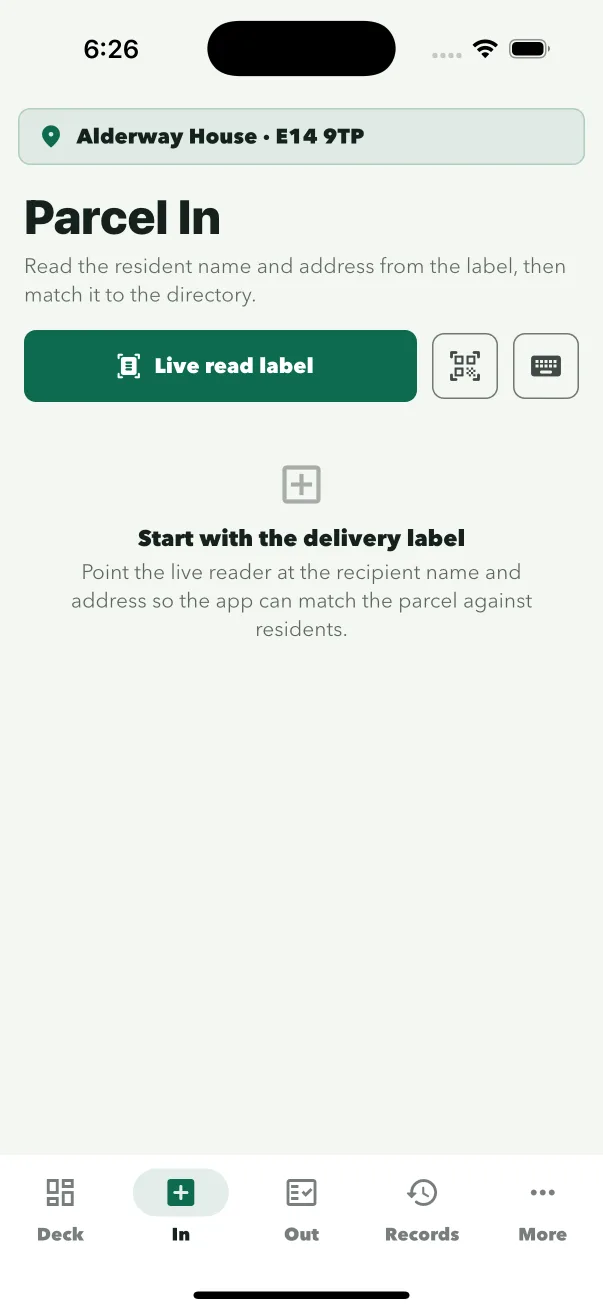
Frame the label, confirm the resident, save once.
ConciergeDeck reads the recipient block while the parcel is in front of staff. The suggested resident is reviewed before intake is saved.
- Frame the recipient blockManual entry remains available for unclear labels.
- Review the residentConfirm name, flat and building.
- Submit intakeThe parcel moves straight to the ready queue.
Parcel Out
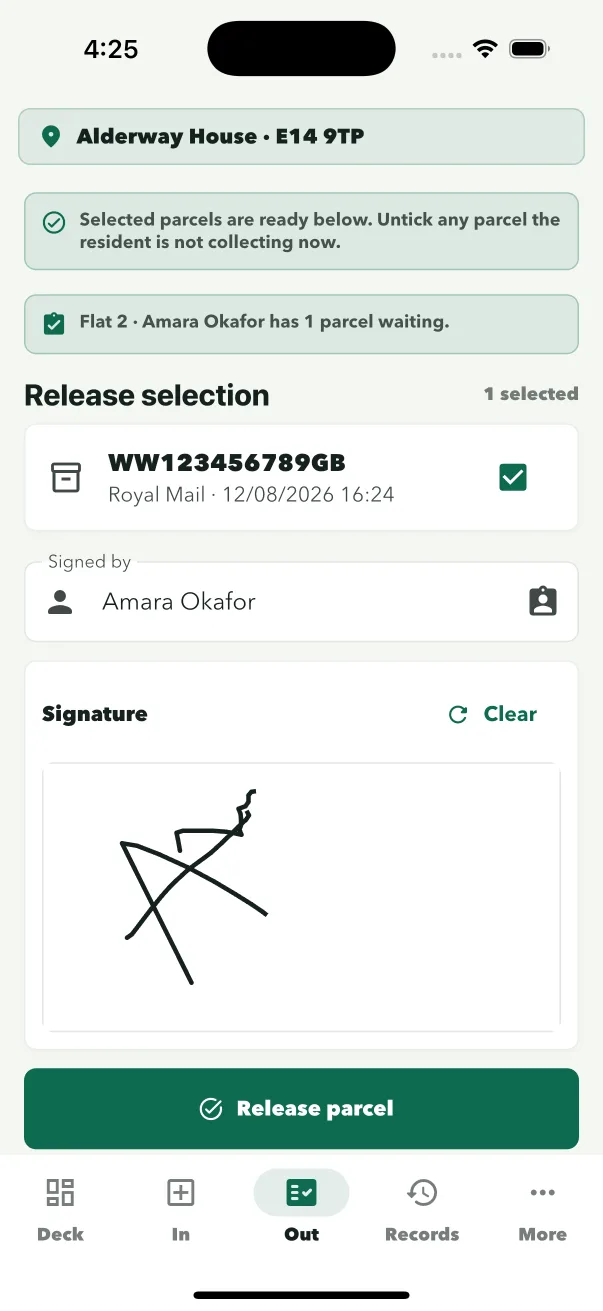
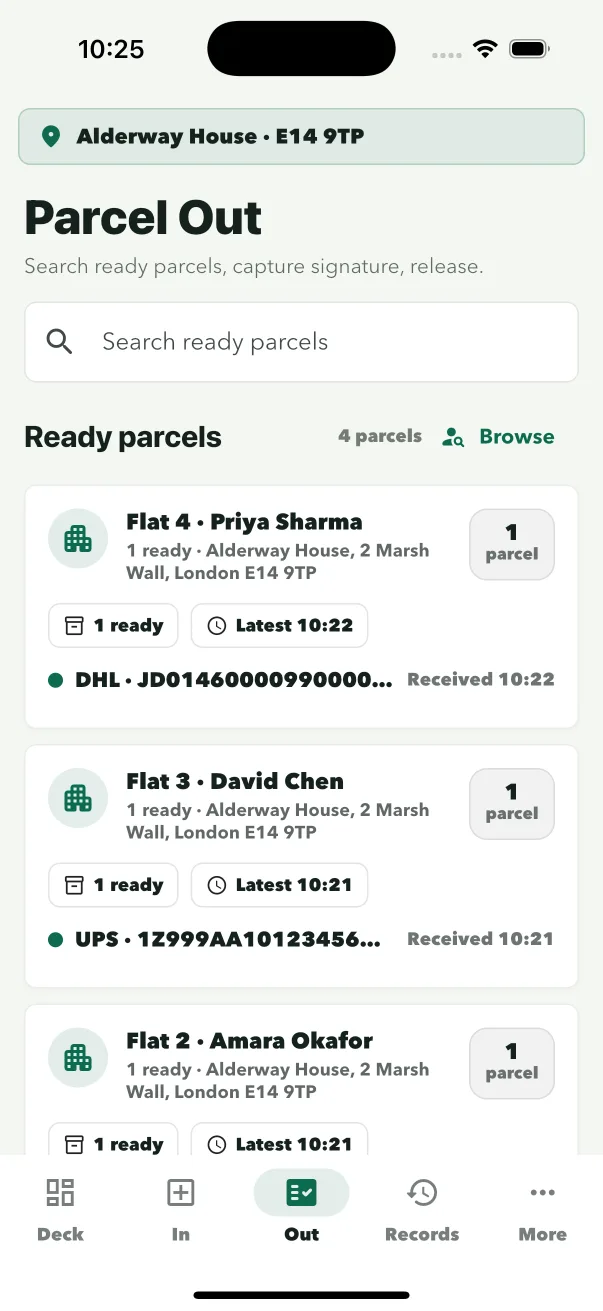
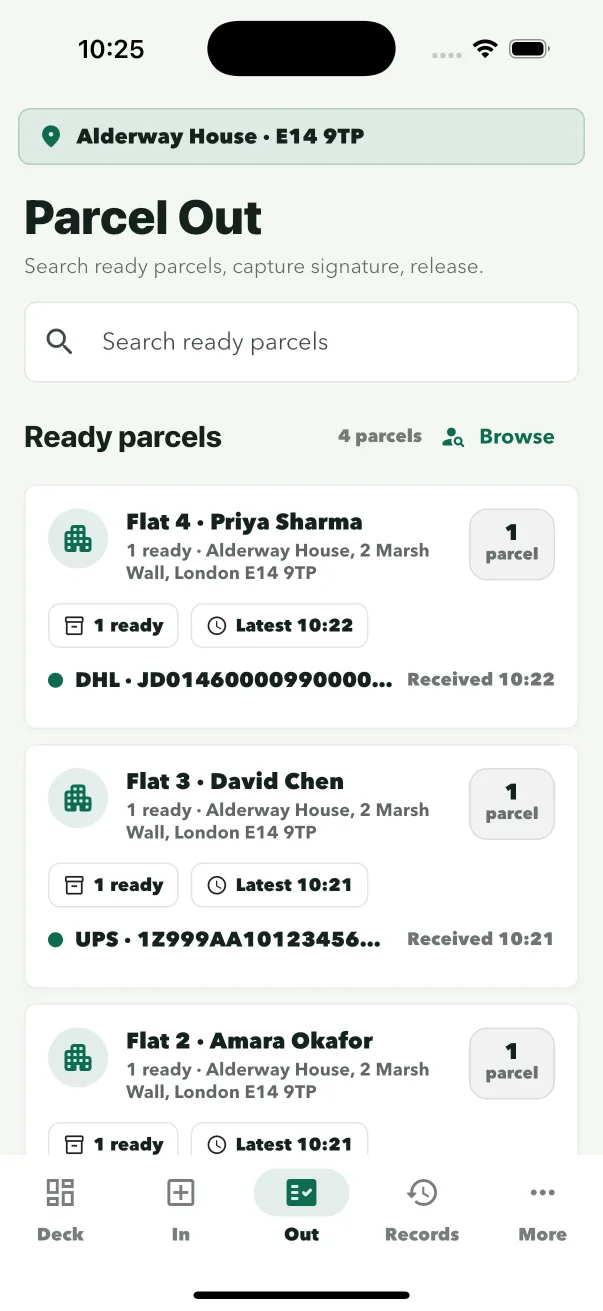
Find the parcel and close the handover with proof.
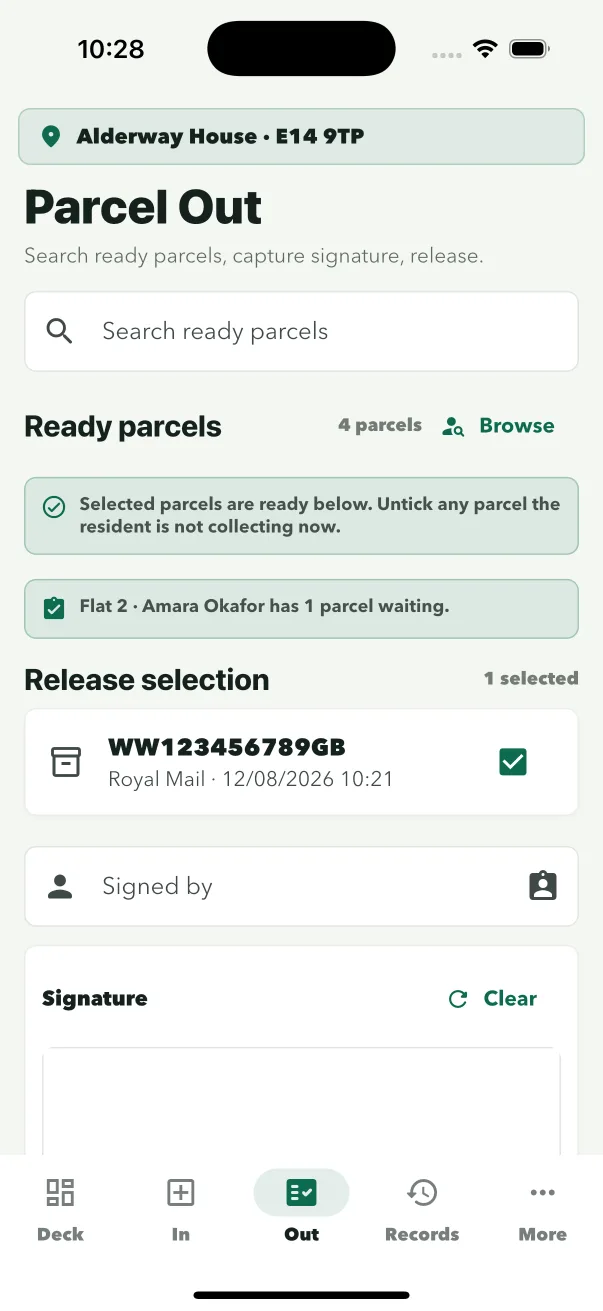
Staff select the waiting parcel, confirm the collector, capture the signature and complete the release in one sequence.
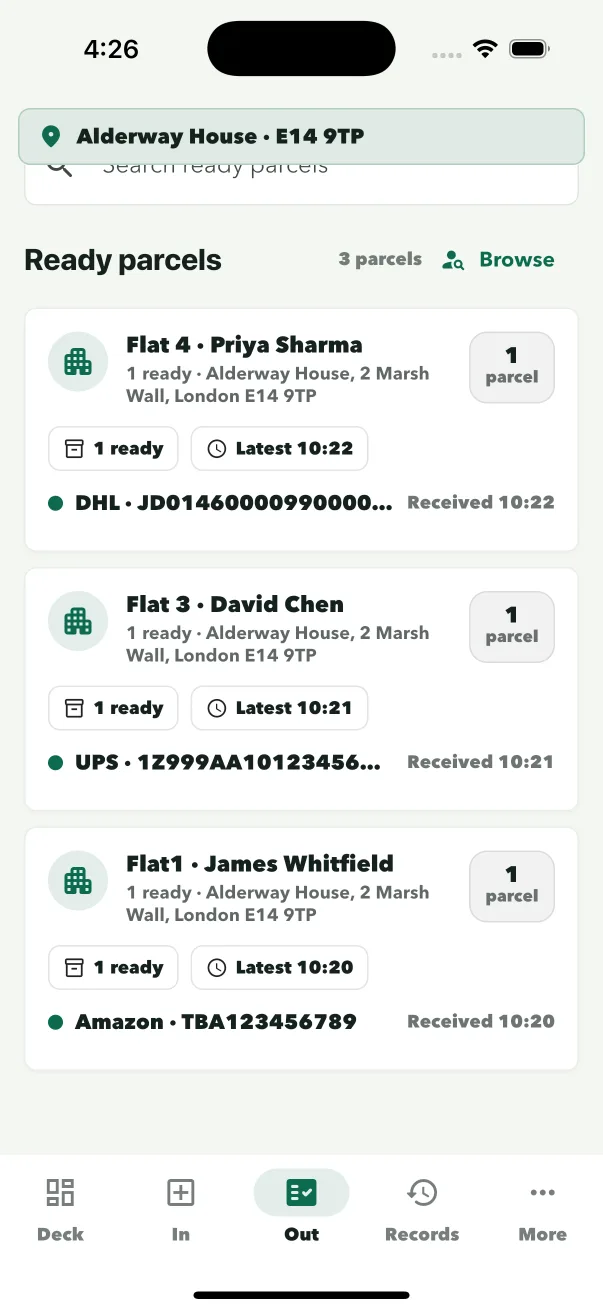
- Find the waiting parcelSearch by resident or browse the ready list.
- Capture collection proofRecord the collector name and signature.
- Complete the releaseThe parcel leaves the ready queue.
Records
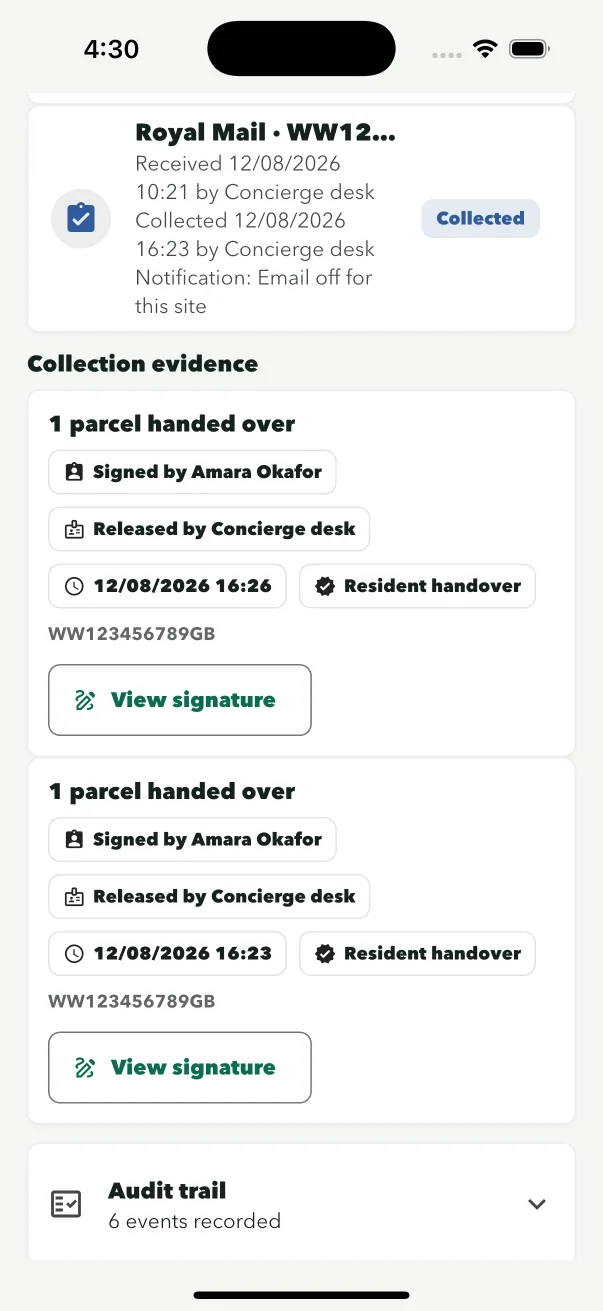
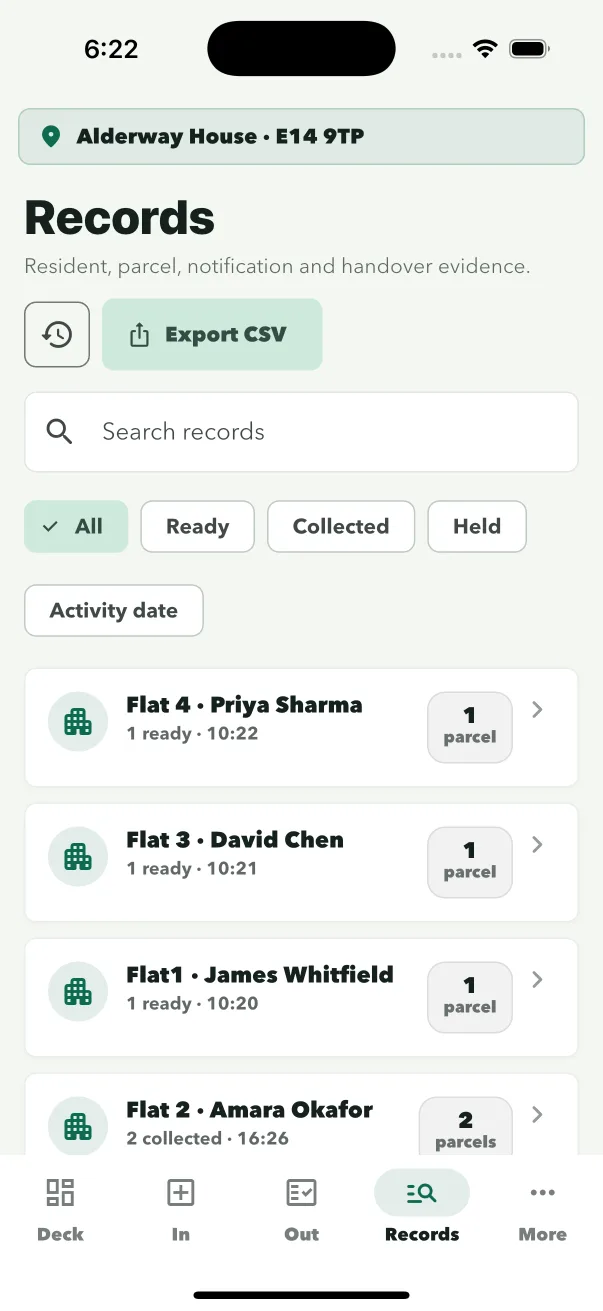
Find the parcel history and its handover evidence.
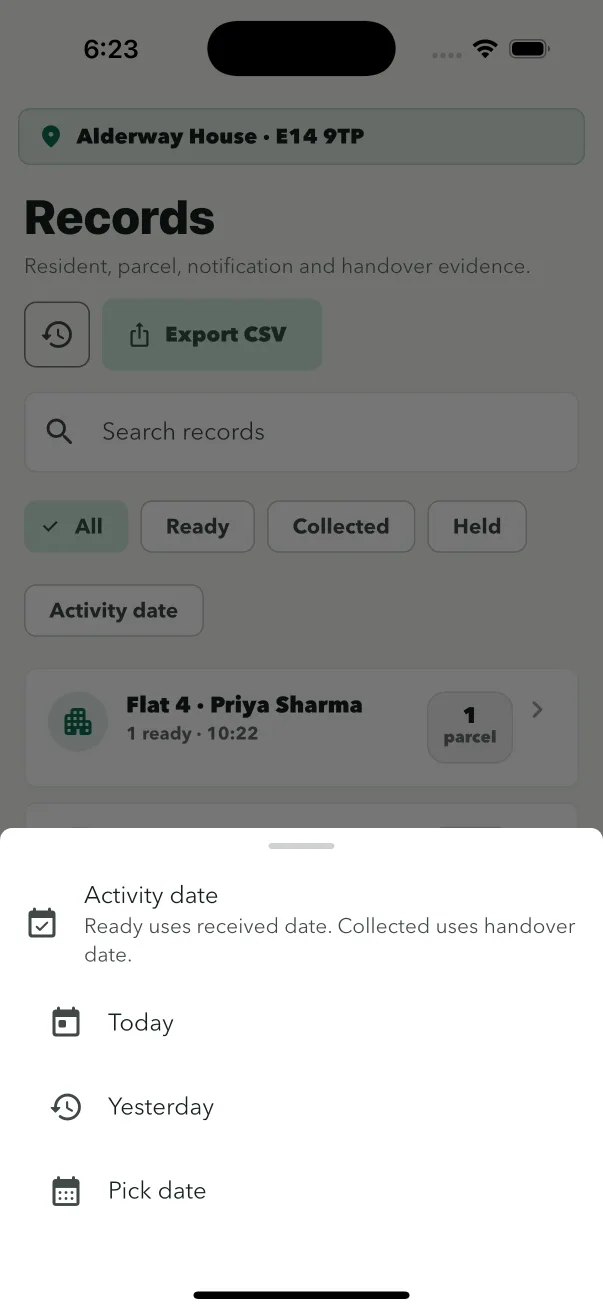
Search by resident or parcel details, narrow the activity date, and review the complete received and collected timeline.
- Search the historyUse resident, parcel, status or activity date.
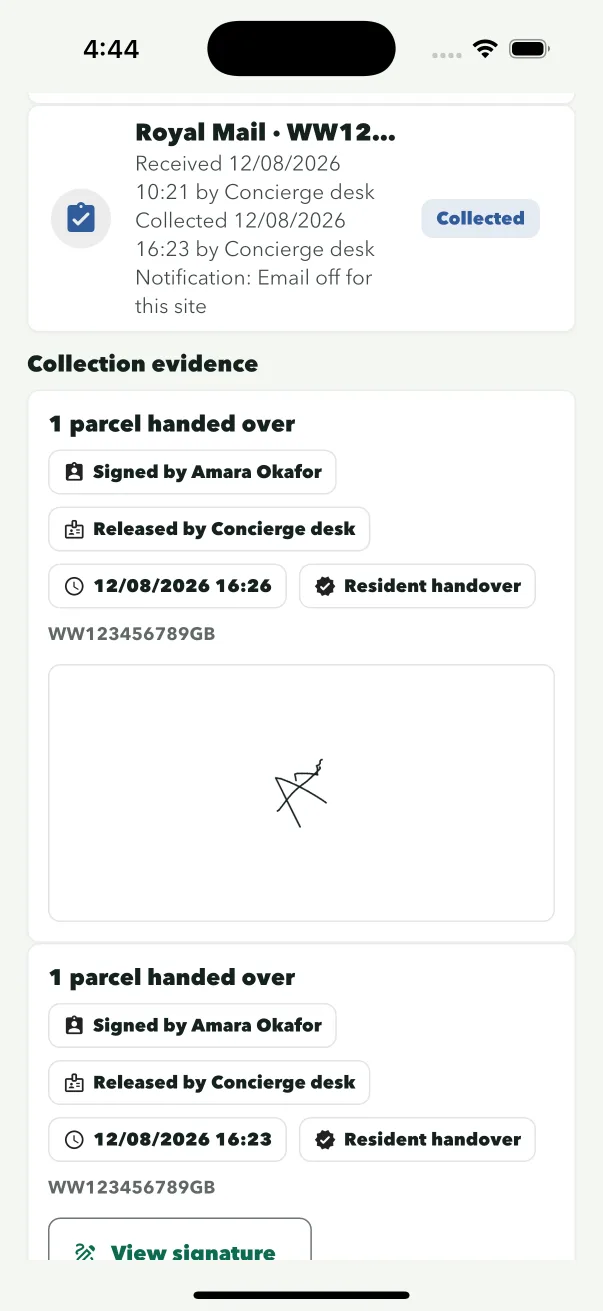
- Review the timelineReceived and collected actions stay connected.
- Open the signatureCollection proof remains one tap away.
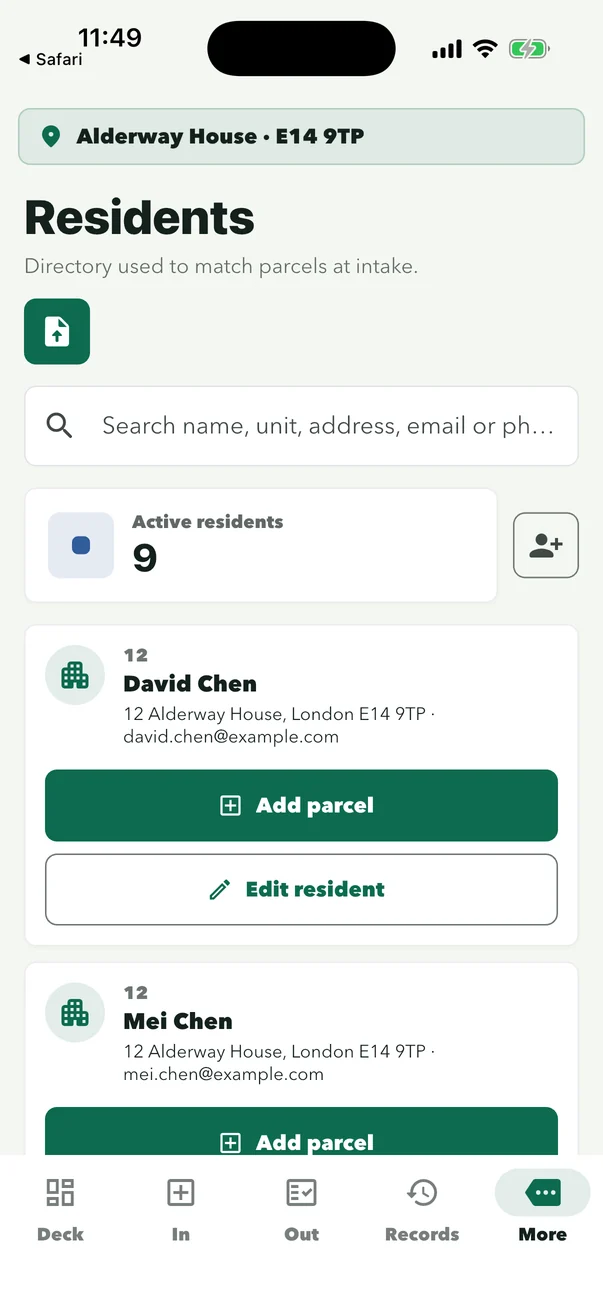
Residents
Keep the directory ready for reliable matching.
Names, flats and building details stay together so staff can begin intake from the right household. Import any move-in spreadsheet as it is — ConciergeDeck matches the columns, joins split names, and after a turnover offers to archive everyone who left.
- Open the directoryResidents remain inside the site app.
- Check the householdConfirm name, flat and full address.
- Start from the residentBegin Parcel In from the correct record.
Key Desk
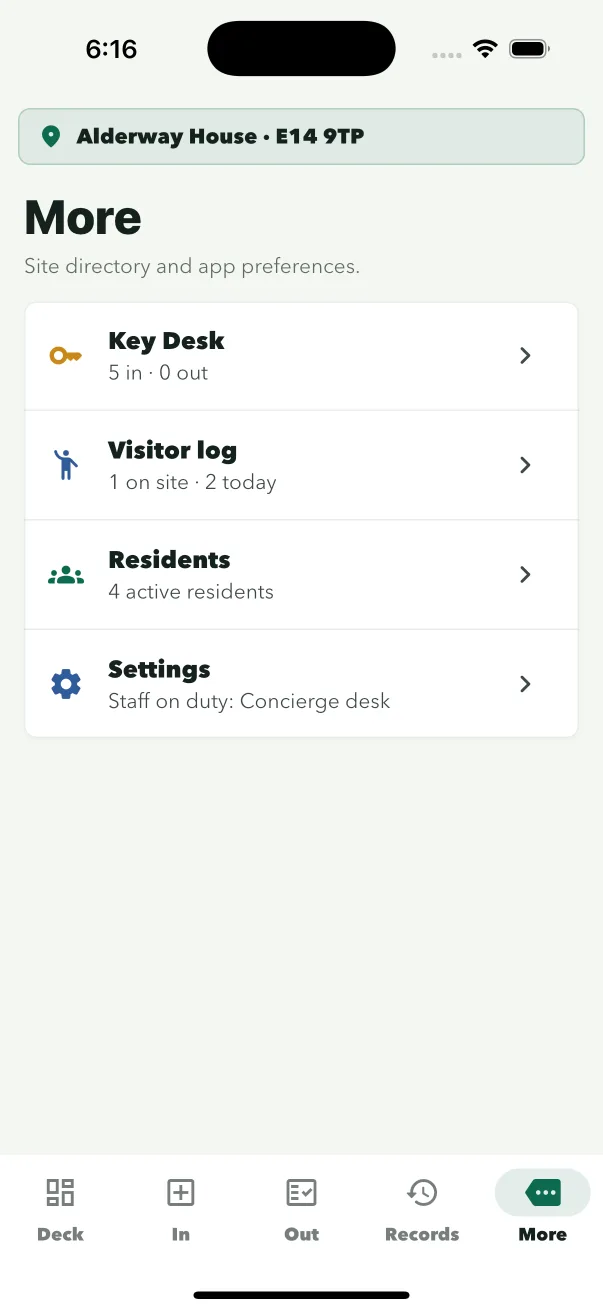
Keep key and fob custody clear, separate and signed for.
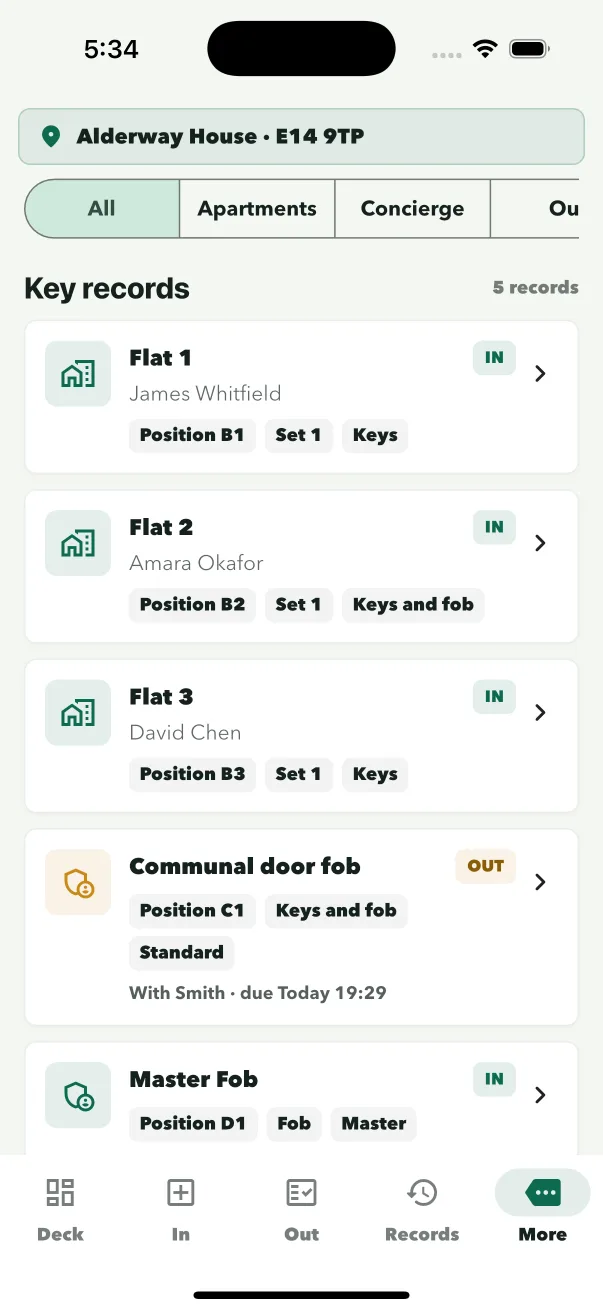
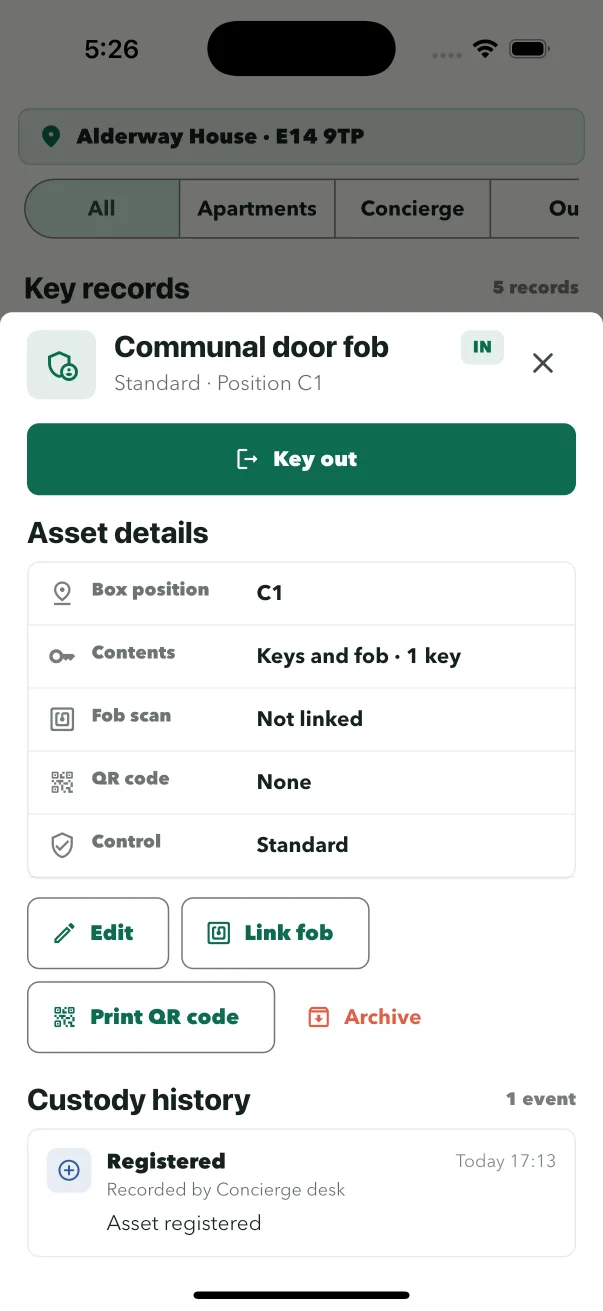
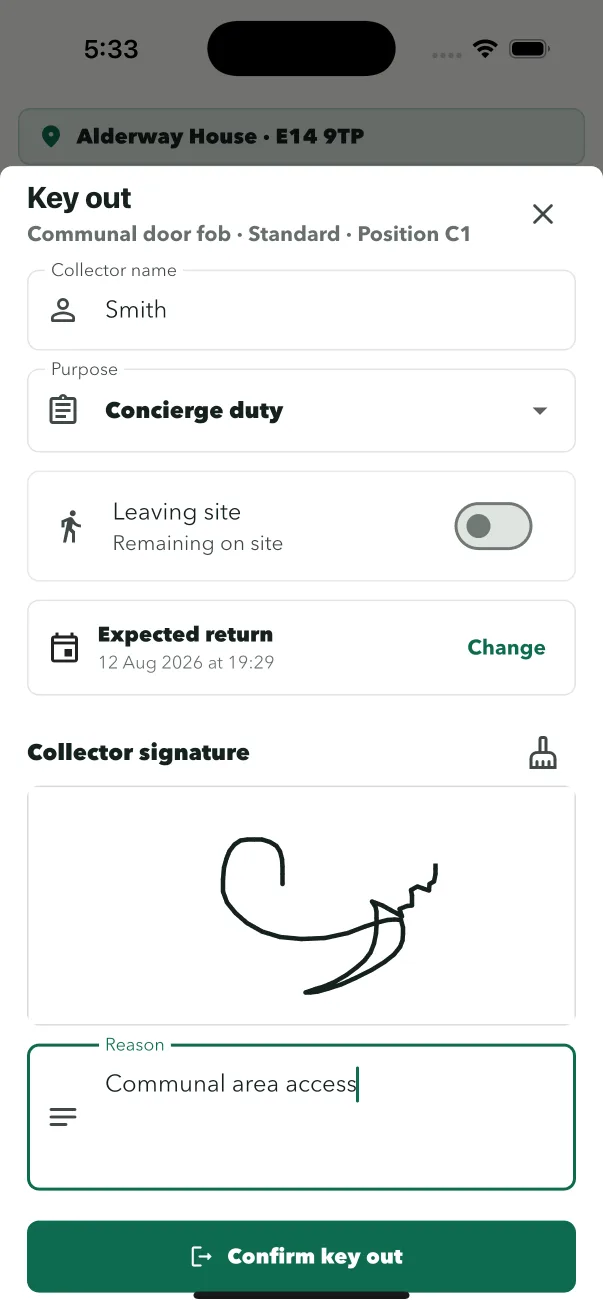
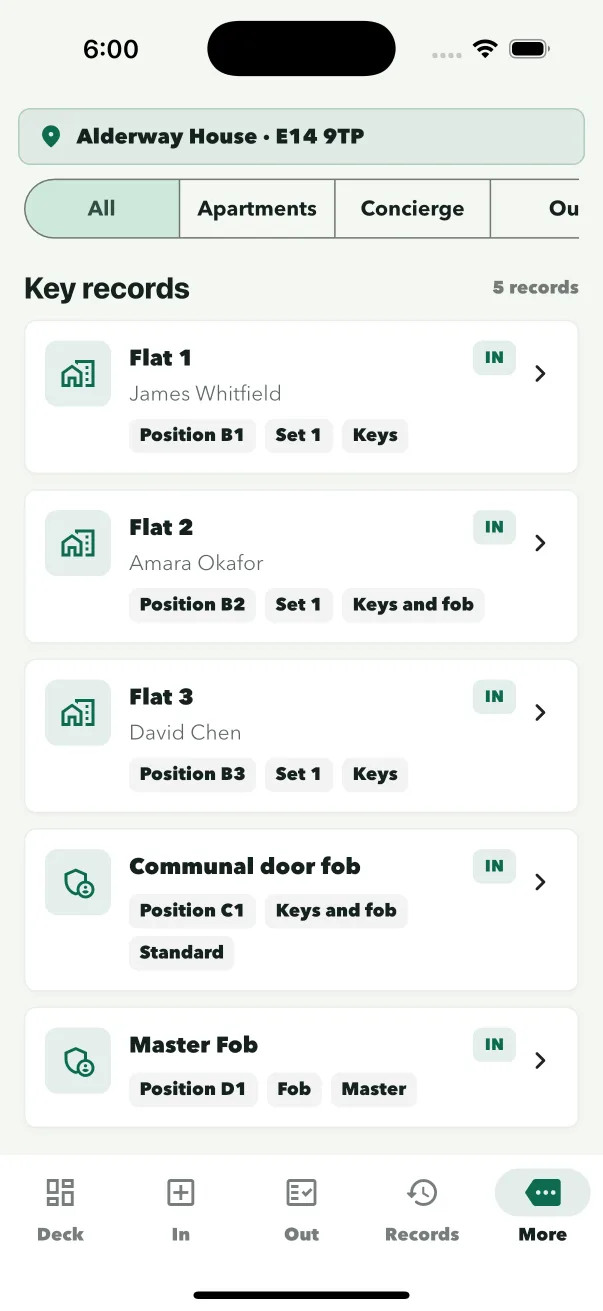
Key Desk runs alongside the parcel queue with the same site sign-in and staff profiles, but keeps its own records. Every hand-out and return is recorded against the key or fob, the person, and the staff member on duty.
- Register keys and fobsCapture the box position, set and contents — scan a fob, print a QR key tag, or add it manually.
- Hand out with proofRecord who is taking it and why, and capture a signature.
- Log the returnCustody updates instantly and the full history stays intact.
Release approval
Restricted and master keys need a staff PIN to release.
Keys marked restricted or master only leave the desk after the staff member on duty confirms with their personal PIN — every hand-out is recorded against their profile with a signature, so high-risk access is always deliberate and accountable.
Included in every planQR key tags
Every key set can carry a printed QR tag.
Some older door fobs cannot be read by any iPhone — so ConciergeDeck prints a key-tag-sized QR code instead. Stick it on the ring and scanning records the set in or out on any supported device. Tags are deliberately anonymous: no flat, resident or box details ever appear on the keyring.
Included in every planVisitor log
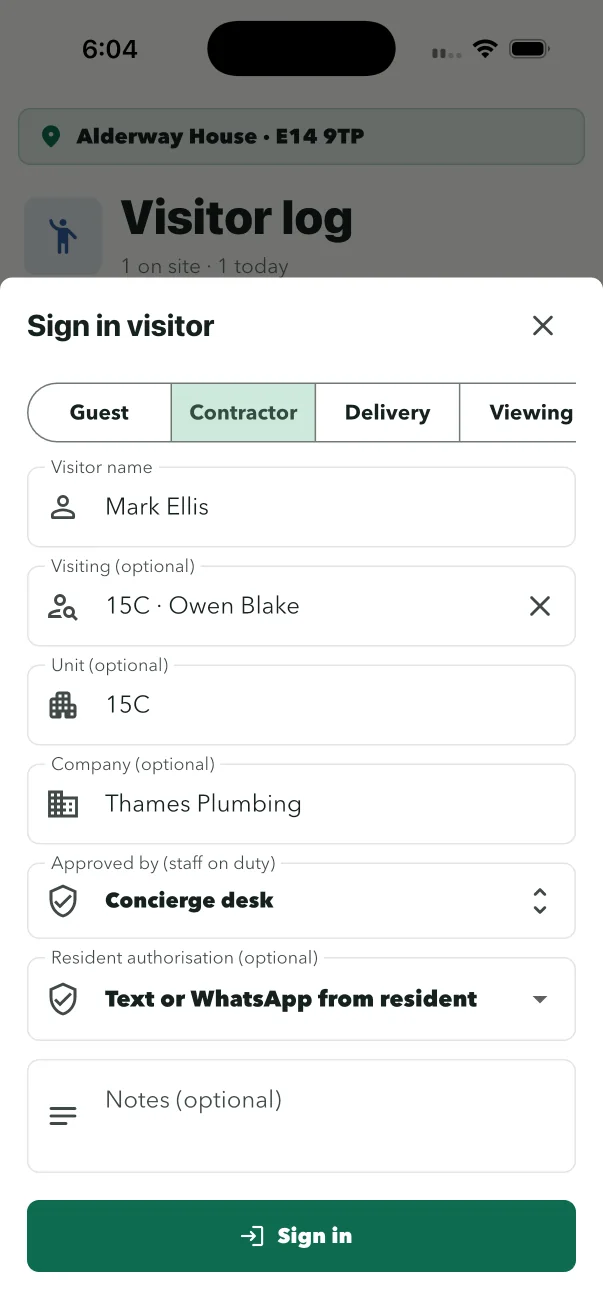
Replace the paper visitor book. Keep the evacuation list live.
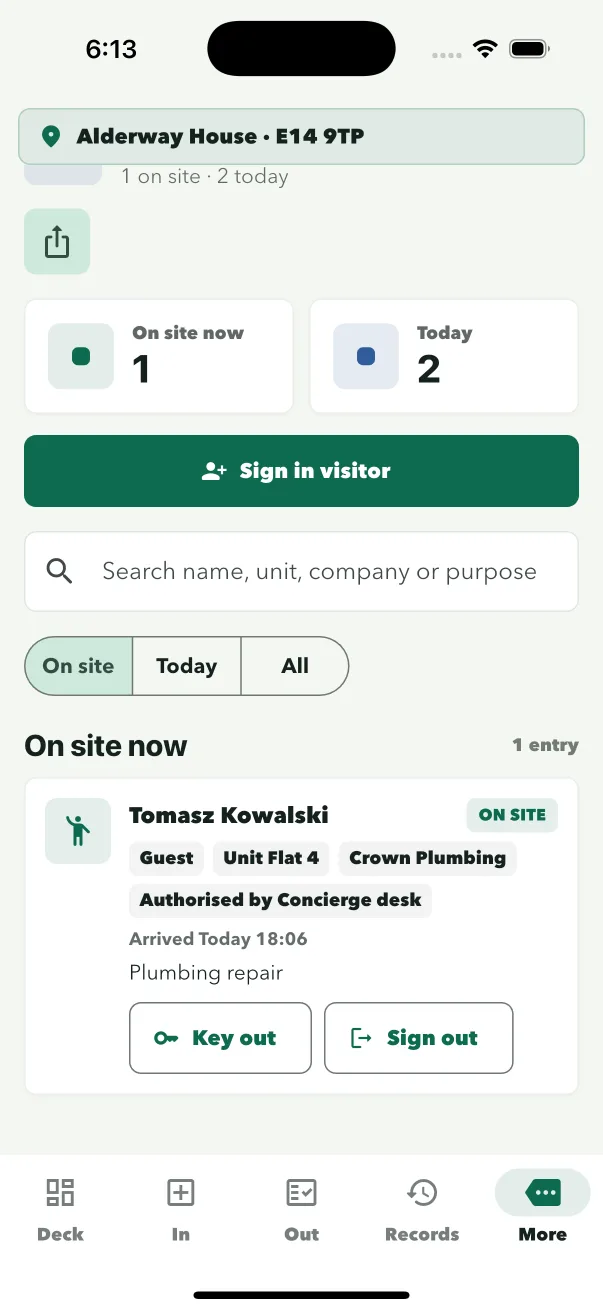
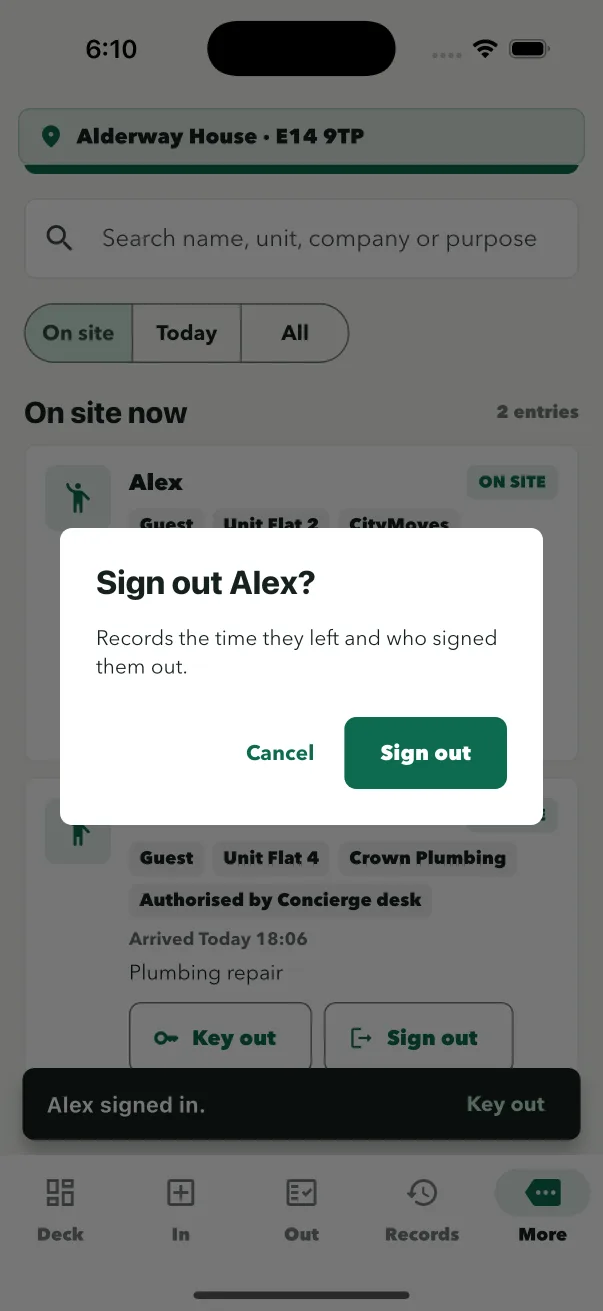
Sign guests and contractors in and out with staff attribution. The on-site view shows everyone in the building right now, and each visit can link to the keys handed out — so nobody leaves with a set still in their pocket unnoticed.
- Sign the visitor inName is all that is required; unit, company and purpose are one tap. The staff on duty fills Approved by, and you can note how the resident authorised the visit.
- Hand keys in one stepKey out to the visitor with their details prefilled.
- Sign out, keys chasedLeaving with keys still out? The desk is told before it happens.
Resident email
Turn on resident email for the site, connect the site’s email, then choose how it looks.
Resident email is optional and off for each site until it is switched on. Once it is on and a sender mailbox is connected in the site app, each parcel logged for a resident with an email address can be sent a notice from that mailbox, in the style chosen in Settings. Parcel intake, signatures, release and records work the same with email on or off.
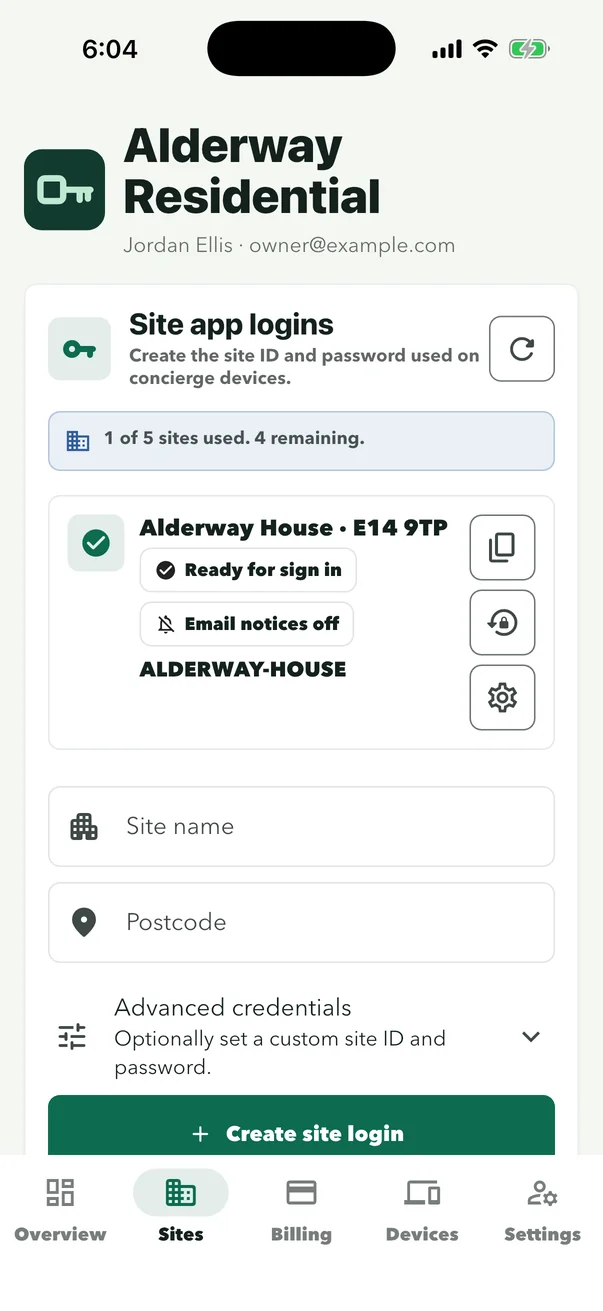
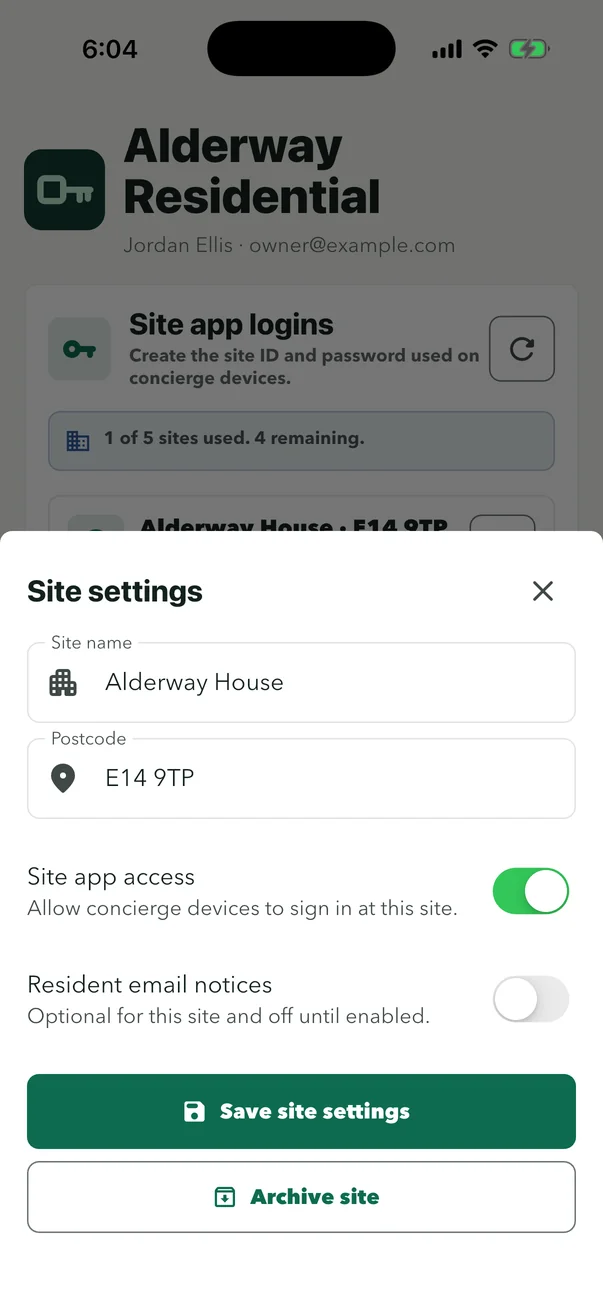
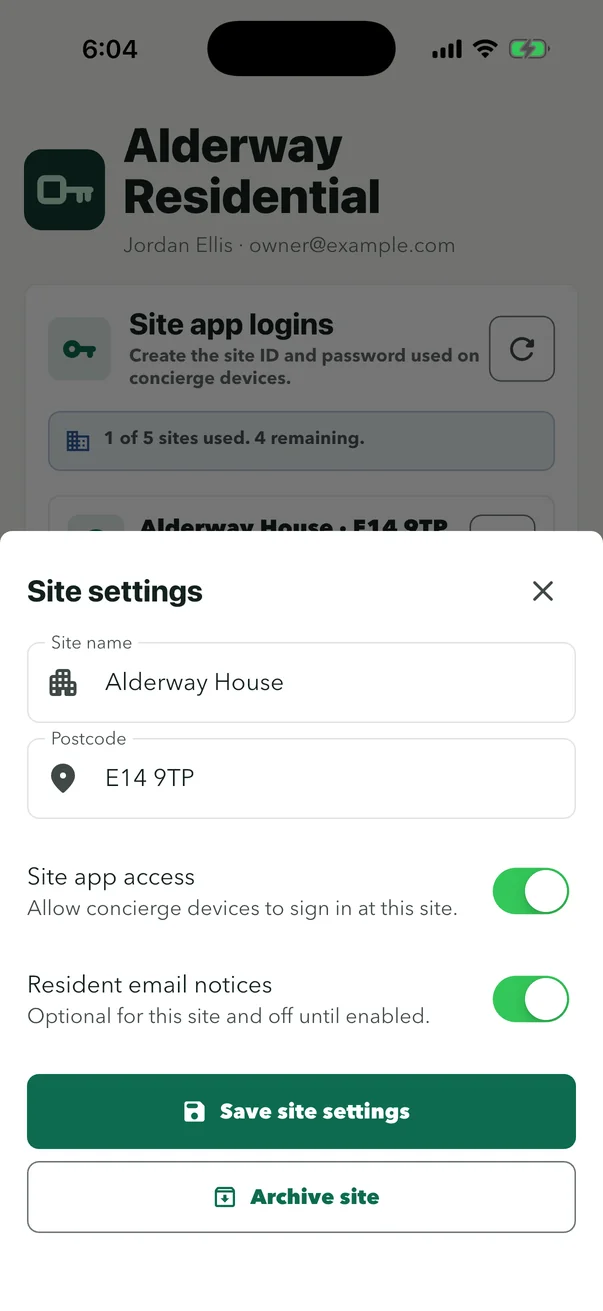
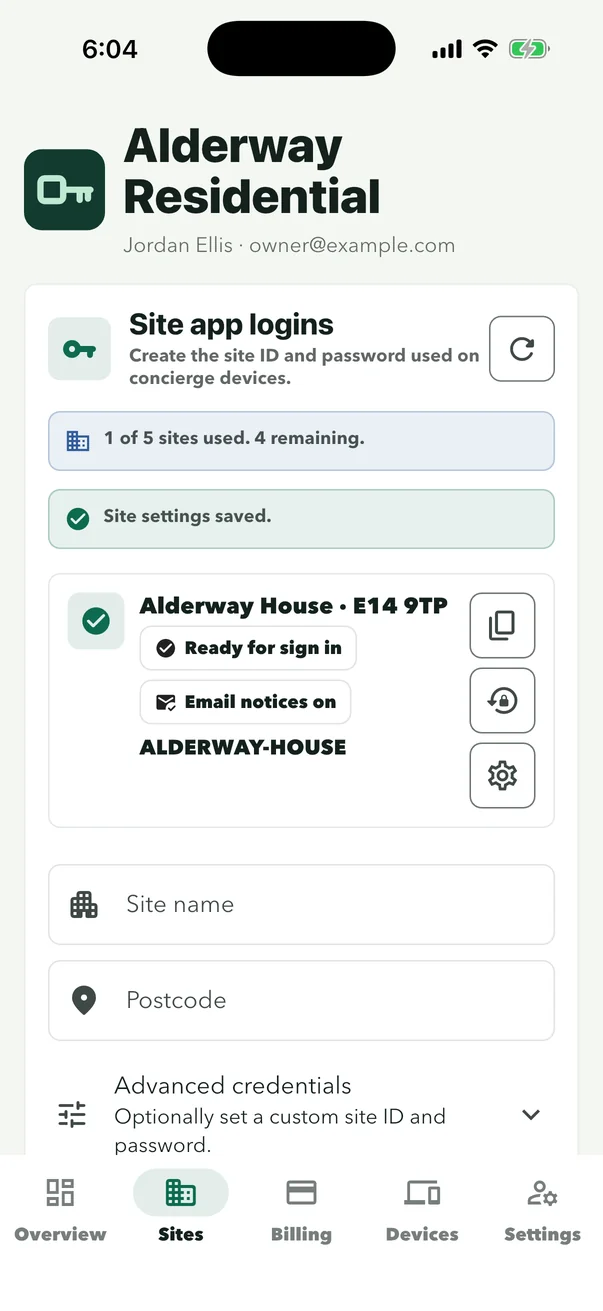
- Turn on resident email for the siteIn the owner app: Sites, the gear on the site’s card, switch on Resident email notices, then Save site settings. The card then shows Email notices on. Staff then connect the site’s email and choose the style under Settings in the site app. On plans without resident notices the switch can’t be turned on.
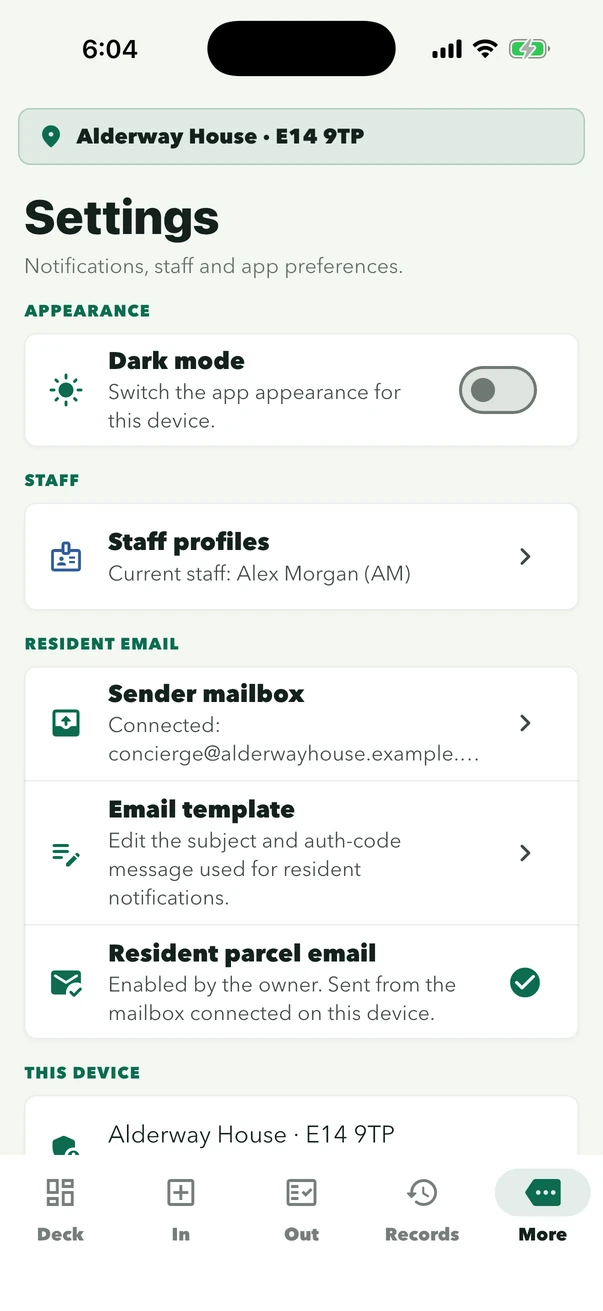
- Connect the site’s emailIn the site app: More, then Settings, then Sender mailbox. There are three ways to connect, each with its own guide in owner help: a Gmail address with an app password, Microsoft 365 or Outlook by signing in with Microsoft, or another provider, such as an address on your own domain. The mailbox is saved on the site’s reception phone. Step-by-step guides in owner help
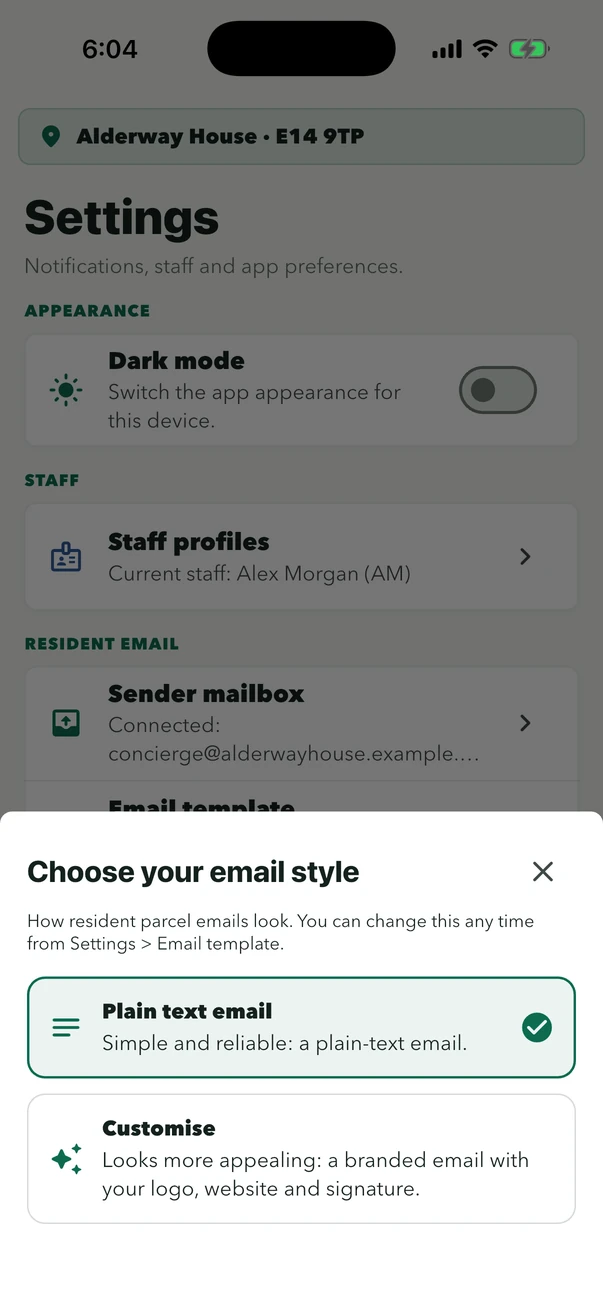
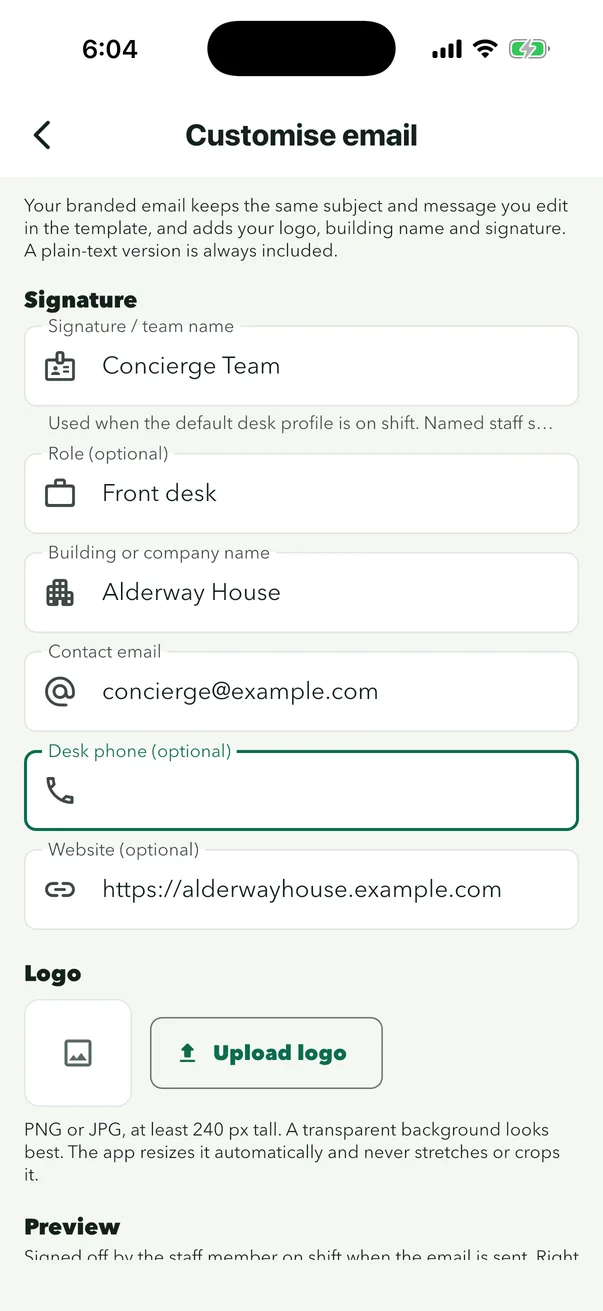
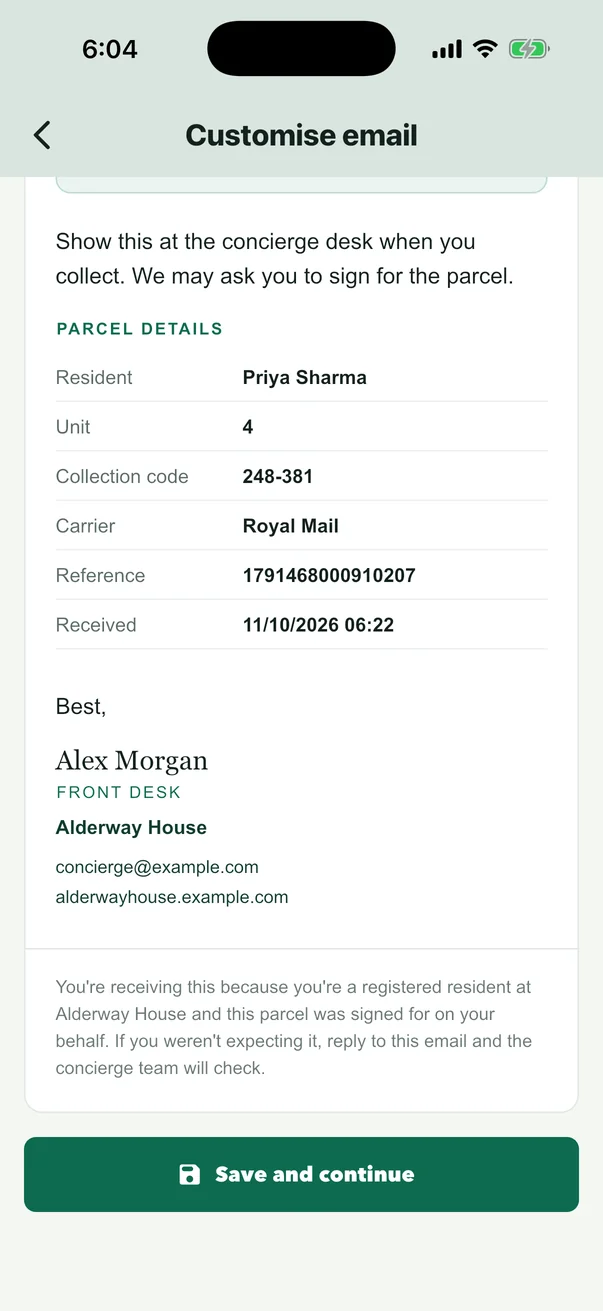
- Choose the email styleSettings, then Email template. Pick Plain text email, or Customise to add your sign-off, contact details and logo. Check the preview, tap Save and continue, then Save template.
- Send from the DeckWhen notices are waiting, a banner on the Deck opens Resident notifications. Tap Send all pending notifications.
For owners
Setting up a site?
Signed-in owners can open Help & Setup for site credentials, the reception phone, resident email and billing.